Background #
Like many I had grown up with an old IBM keyboard growing up. I’ve always appreciated a good keyboard and throughout the years I’ve used many brands: logitech, Razer, and Ducky to name a few. So I can’t necessarily remember how I discovered the world of custom mechanical keyboards, it could have been that I stumbled onto r/MechanicalKeyboards or I’d found a set of keycaps that peaked my interest.
Never the less in October 2019 I discovered GeekHack, a great source for all sorts of custom keyboard components. Specifically this thread on GMK Dracula caught my eye. I loved the set, and was a huge fan of the Dracula (if you haven’t realised from this site alone).
Purchase Process #
I didn’t necessarily know where to begin, but the starting thread was helpful enough, pointing to a suppliers - including one for the Oceania region DailyClack. These folks had a helpful slack and that helped get me start a great deal.
The typical way a lot of these work is they put together an interest check for an idea, if there’s enough support for the project they’ll go to the group buy stage where people can pay for their selection, and then after that’s locked in develop it and send it to them via the suppliers.
This meant that if you missed out on the group buy stage, your only other option was the second hand market, where the markups were huge, or hope that they re-release it again for another chance to buy in.
Delays #
While the interest checks themselves are normally relatively short, there’s a lot of quality control that goes into the early stages of manufacturing before group buying, namely because you don’t want to spend quite a lot of money on an inferior product. On top of that this was pre-pandemic, so that ended up extending a lot of the times out quite a bit.
Never the less it was a good test of patience, and a worthwhile one in my eyes.
Specifications #
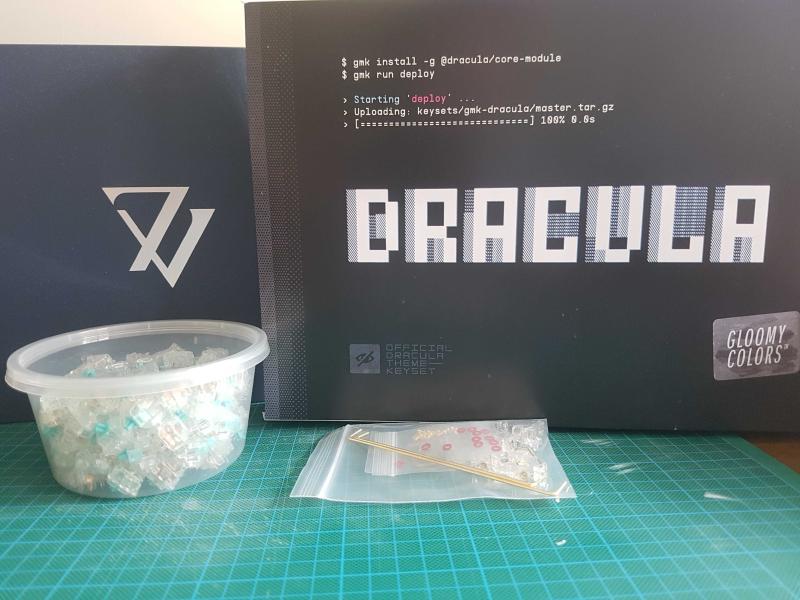
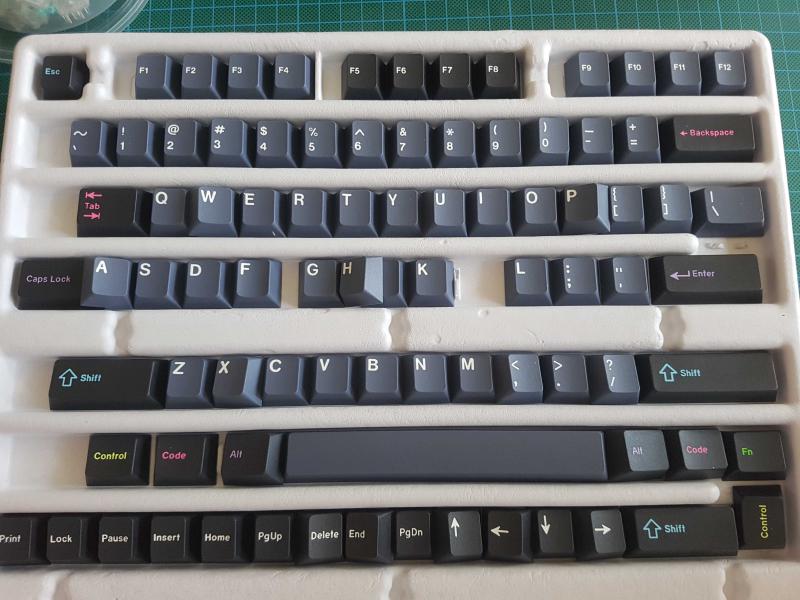
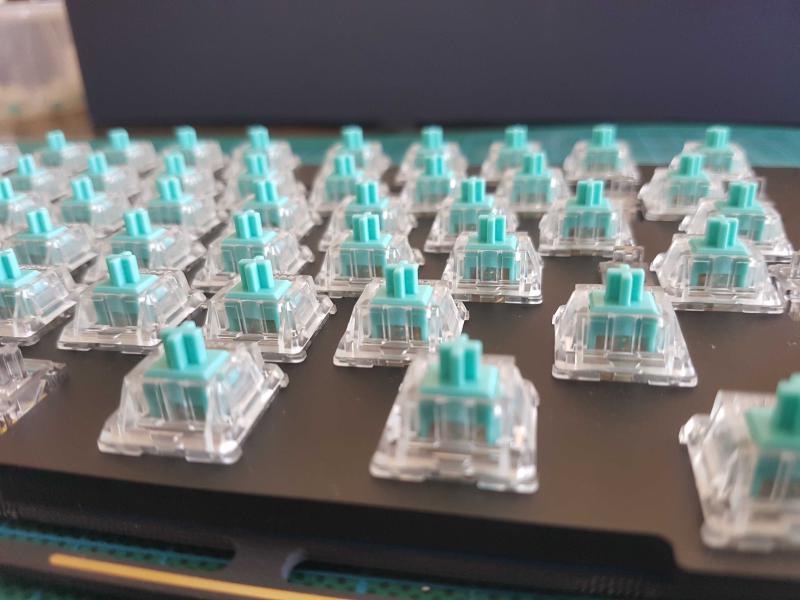
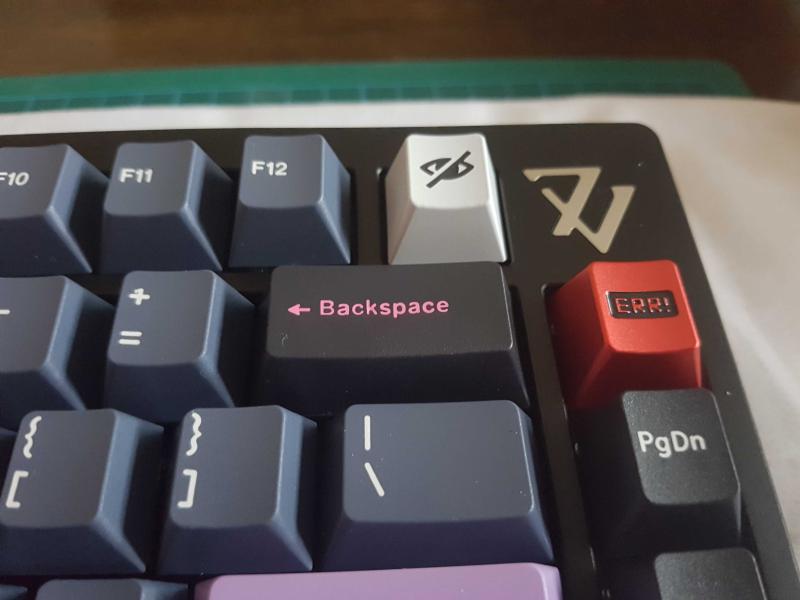
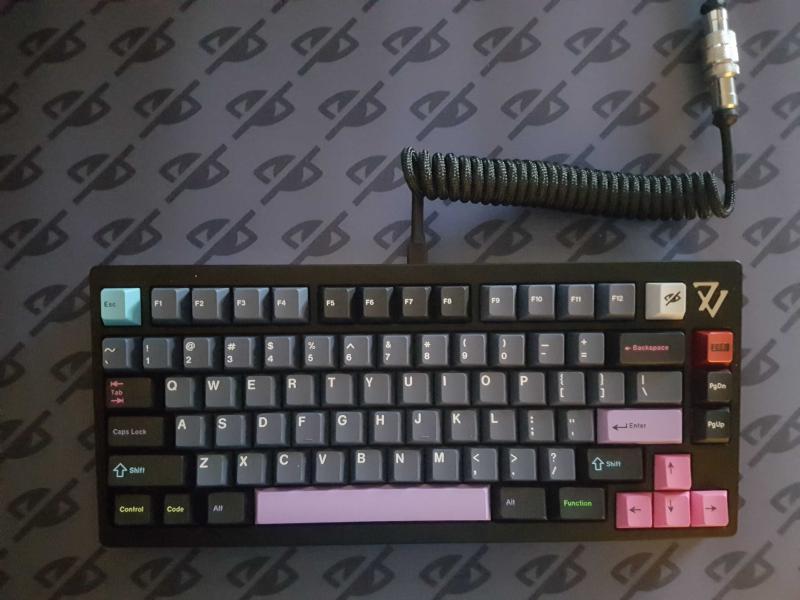
In the end I settled on GMK Dracula keycaps, on a 7V frame, with Tealios V2 Linear Switches and Durock PCB Mount Screw-In Stabilisers V2 (these last two were ordered from SwitchKeys)
To add some flare I ordered a custom USB cable with an aviator connector from Skippy’s Custom PC.
Building #
Once we had acquired everything, it was now time to start the assembly process.
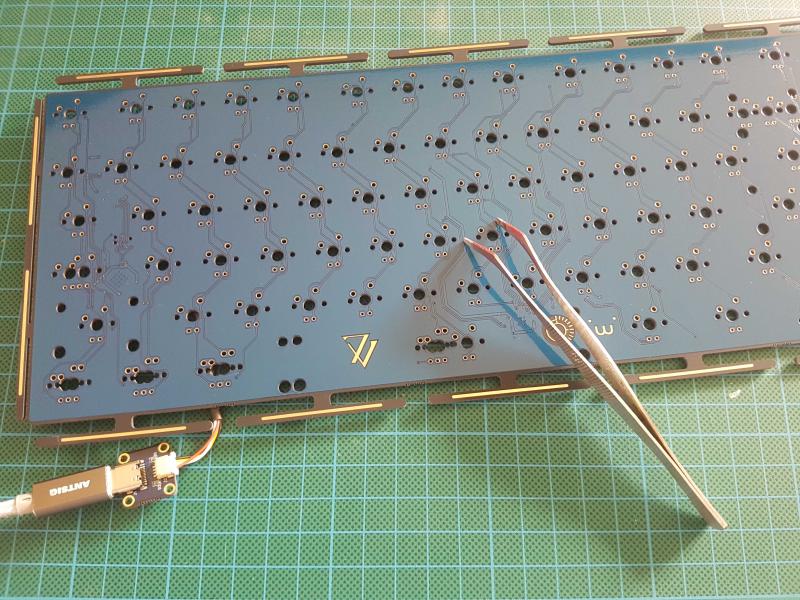
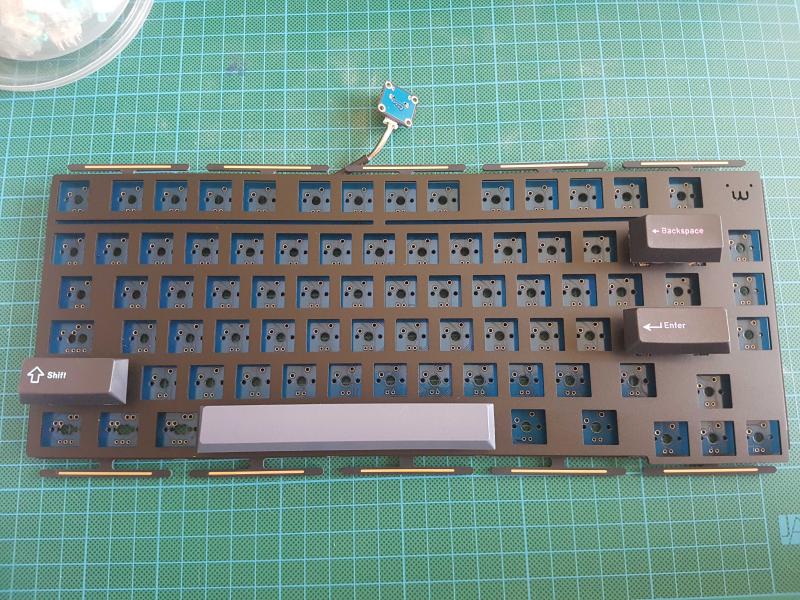
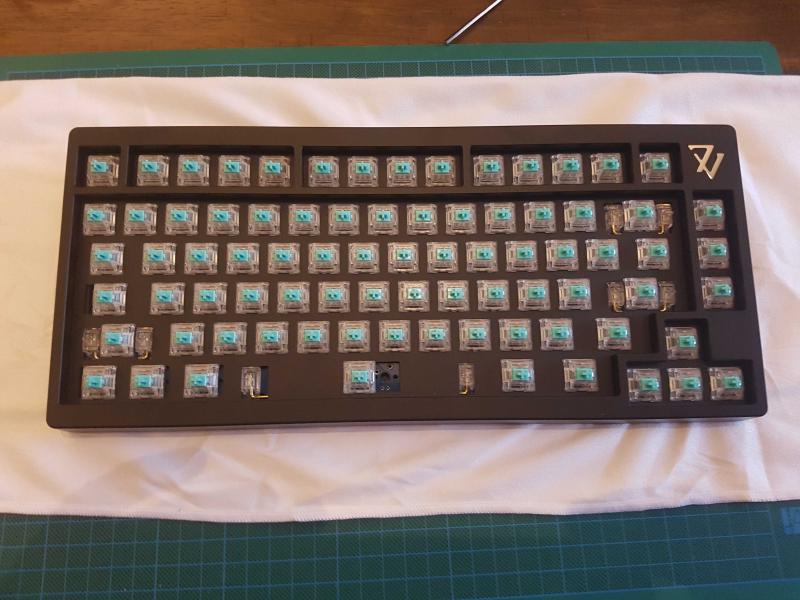
Before we get to soldering, we need to check the circuitry itself. To do this we connect it to a PC via USB and run a utility such as VIA, then simply shorting the connection (as seen below) is the equivalent to pressing a button. So we can check all of our keys work before we solder in the switches.

Next we need to add the stabalisers and the dampening plate. We need to ensure that the stabalisers match the length specified by the circuitry, so it’s always good to check the details before purchasing them.
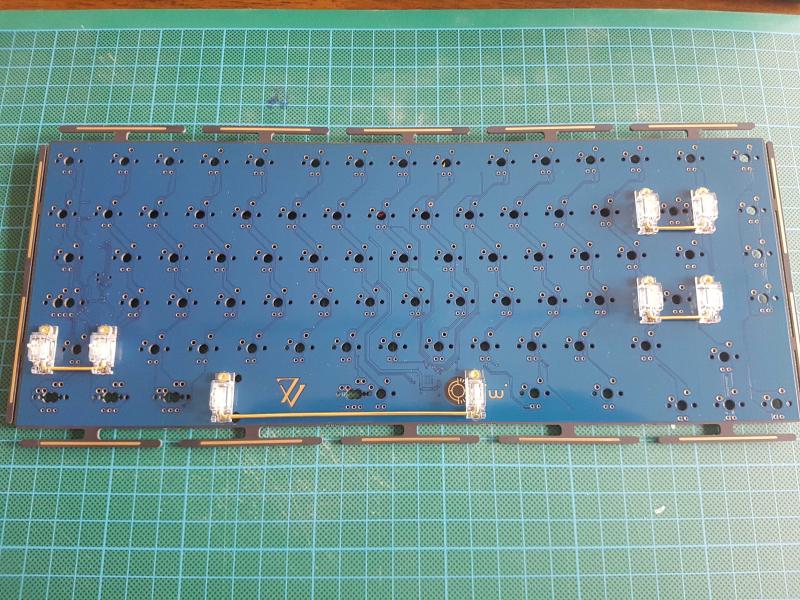
When you get the keys they’ll provide what appears to be duplicates of the same pieces. A lot of these boards can be configured to suit the varying tastes of the consumer, so you could have two space bars, or different length space bars. So before we solder anything in it’s a good to test the layout and see if we’ve got the right lengths.
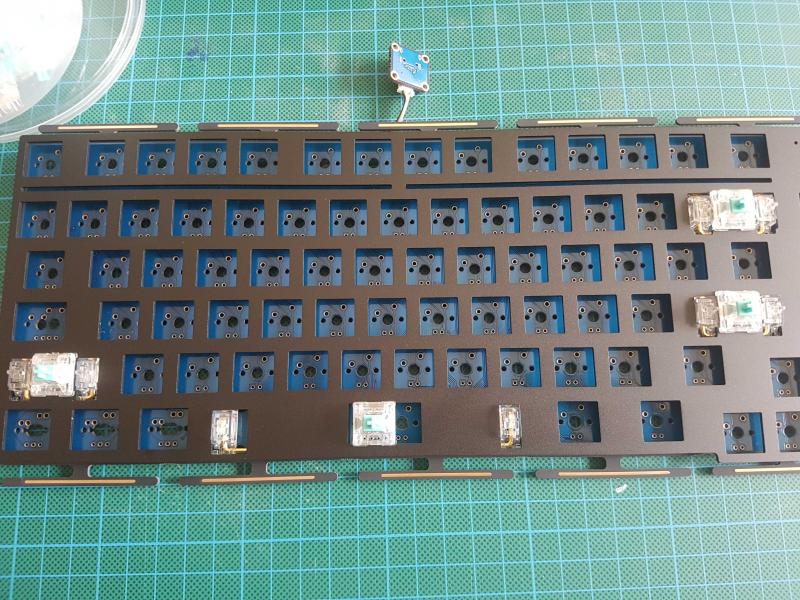
Next we need to use the dampening plate to click in the switches themselves. This will make it easier when we flip it over to start soldering. My tip for soldering is make sure the tip is incredibly hot, place it on the wire you wish to solder for a few seconds to give a chance for the heat to transfer, and then slide the solder on top. If you do it correctly you’ll be left with a polished peak which tells you it’s been applied nicely. If you’re seeing a matte dot then your soldering iron wasn’t hot enough.
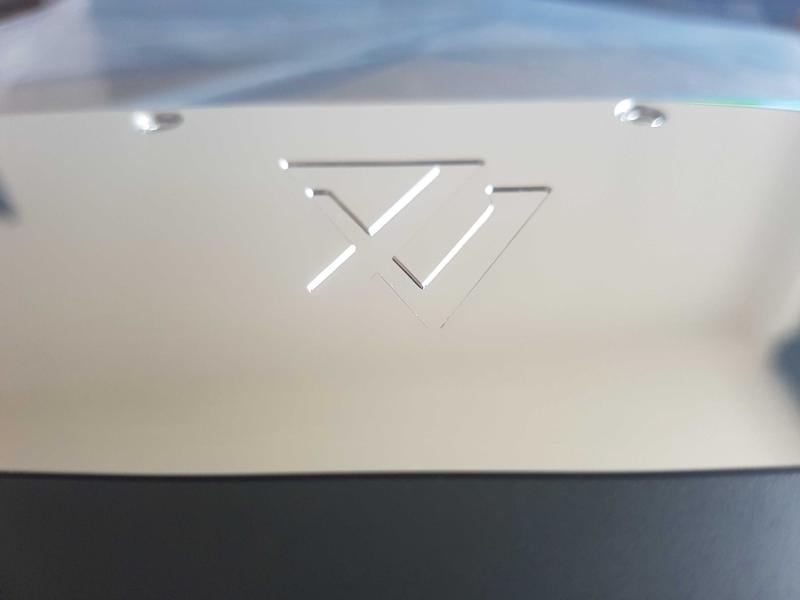
Then we can insert the plate into the aluminium case. The 7V has a heavy solid aluminium plate, that’s polished for a pristine shine. Adding a cotton sheet can protect it from being scratched or damaged.
Then it’s simply a case of sliding on the keycaps, and you’re done! Remember to test again, and if you want to create any macros or other customisation, VIA can assist with that.
Summary #
Was it worth it? In my mind yes, it was a long process, and a costly one, but the process was simple and I enjoyed it. This keyboard will last me for years to come, it has a unique response unlike any keyboard I’ve used before it and a loud satisfying click that I love.
If I had to make any changes it would to have lubed the switches before I soldered them in, but like all new ventures there’s always things to learn and take away for next time.
Timeline #
4 October 2019:
- Ordered GMK Dracula set
10 April 2020:
- Ordered 7v
16 June 2021:
- Cable ordered
- Switches ordered
- Stabalisers ordered
17 June 2021:
- Switches shipped
- Stabalisers shipped
3 July 2021:
- Cable shipped
23 September 2021:
- 7v Shipped
- GMK Dracula shipped
28 September 2021:
- Received 7v
11 November 2021:
- Built Keyboard